I love Arts and Crafts, it's no secret that I get as much pleasure from doing them as the kids do. So, when I find a set that we can all enjoy for a reasonable price, I buy it.
I was looking at the new craft section in K.Mart the other day, and found Cre8tiv Kidz, Suncatcher set. I made something like these with my Nanny when I was little and it hung in my room for years. For $5, it includes 18 designs, 6 stains, a paint brush and the ribbon to hang (some) of them up.
We all had heaps of fun doing them and on this rainy, Pajama Thursday.
What craft sets have you tried that you love!? Link me!
Thursday, 27 June 2013
Monday, 13 May 2013
Kid's Cubby House in an Odd Spot
Recently, we adjusted the toy room, so it was easier to clean, had more play space and donated some toys that they'd grown out of.
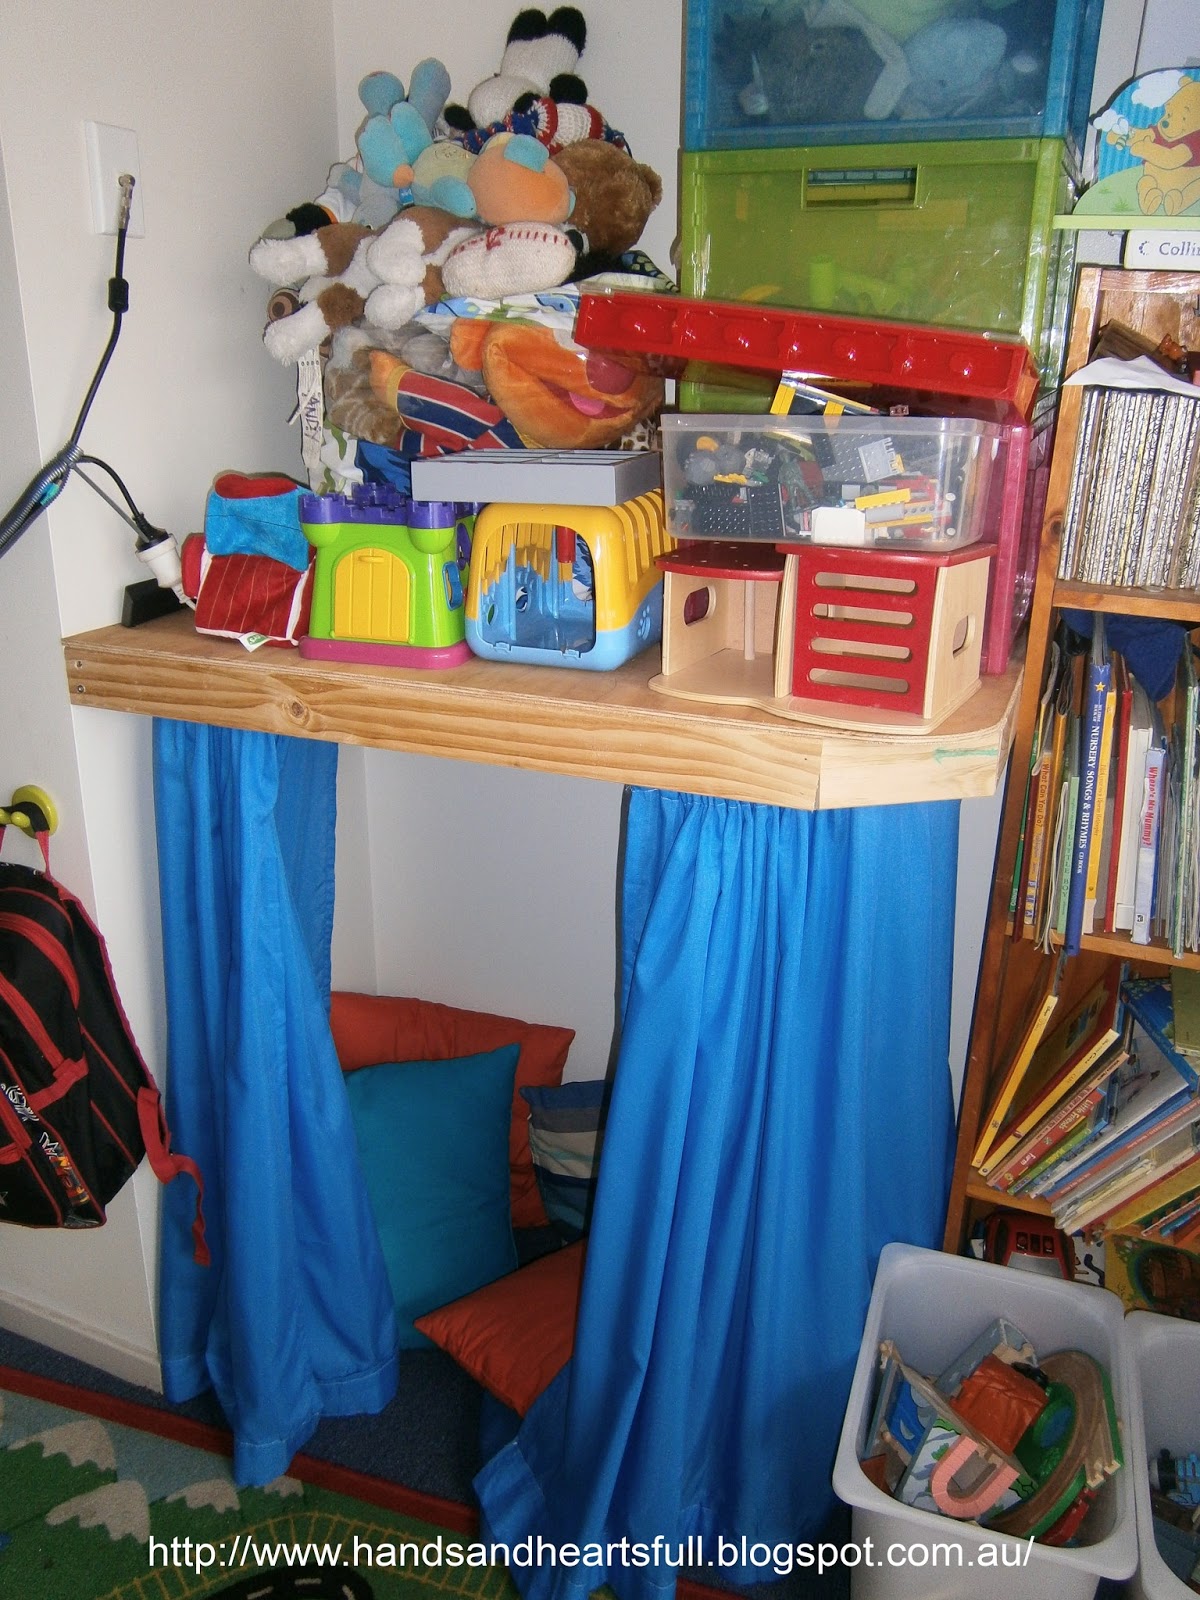
There was an odd little spot, between a wall and a bookshelf and the Hubby had one of those ideas, that we just had to try, fail or not.
We (he) set about building a cubby house, that could also be used as a shelf.
We (I) were very impressed how it turned out.
This is the space we started with. Odd, right? The boys are loving playing with all the "new" things that they forgot they had!
Now, there could have been an easier way to do this, but we were sort of just making it up as we went a long.
There was an odd little spot, between a wall and a bookshelf and the Hubby had one of those ideas, that we just had to try, fail or not.
We (he) set about building a cubby house, that could also be used as a shelf.
We (I) were very impressed how it turned out.
This is the space we started with. Odd, right? The boys are loving playing with all the "new" things that they forgot they had!
Now, there could have been an easier way to do this, but we were sort of just making it up as we went a long.
They love this space. It's been used for hiding, playing Mums and Dads, reading, quiet times and being the dark cave to explore. It doesn't take much space, and fills the gap nicely. We all love the little cubby!
Sunday, 5 May 2013
From TV Cabinet to Perfect Desk!
I have a pretty creative Husband, and while, yes, it does take him some time to complete a projects, when they are complete, they are amazing!
He just finished my re-purposed desk! What do you think?!
The cabinet pictured, isn't ours, but one that's exactly the same.
That goes with our entrance table, which was made from pallets!
Thursday, 2 May 2013
Teddy Bear's Picnic 1st Birthday Party
If you go down to the woods today, you're in for a big surprise.
If you do down to the woods today, you'd better go in disguise.
For every bear, that ever there was, will be there for certain because,
Today's the day that Teddy Bears have their picnic!
Last month it was Ryan and Sophie's first birthday. Yes, it has taken me that long to recover and blog about it.
There were a few things though, that made the party impressive, without going over the top, and I'd love to share them with you.
Firstly though, look how cute they are all grown up.
Hazaah! Onto the party.
PICNIC BLANKET
PICNIC BLANKET
Essentially, I cut each "square" out and sewed them together into rows first, dots, stripes, dots, stripes.
The stripe, dots, stripe, dots. Did that again, and then sewed the long strips of fabric together, matching up the corners the best I could.
I used 4 tarps (you can see the blue poking though in the picture) and sewed them together, ensuring the eyelets were upward.
I laid the tarps down, then the fabric over top, and hand sewed long ribbons on to the fabric where each of the eyelets are. I can then remove the fabric whenever I want to, to clean it. We used tent pegs to peg the tarps down, so the kids didn't slide all over the place.
It was lovely to see them all in their party outfits playing on the blanket.
COMMEMORATIVE BEARS
With the left over fabric, I made some bows, and stitched them on. Each guest signed the teddy and now the Twins will have them to look at forever!
Do yourself a favour and use a laundry marker, not a permanent marker. The laundry marker wont bleed into the fabric, which results in a nicer signature.
TEDDY BEAR CAKES
I was lucky enough to win a Cake 2 The Rescue twin cake kit! These kits come with "husband proof" baking instructions, and everything you need, except a mixer, oven, a bit of time and some spoon lickers.
They are really fantastic and if you're in a bind, they send them out very very quickly. They also taste really great!
DECORATIONS
PULL STRING PINATA
For this one, she made teddy bears from paper mache and used a box to hold the treats. Before assembly she cut a flap on the bottom of the box. She then poked lots of holes into the flap. She threaded one string through (near the open part of the flap) and secured it with duct tape which would open the flap when pulled on. Then, she threaded the string though the holes, and tied a small knot into the string of each, so that there was some resistance, and the strings didn't fall though. She secured the bottom with masking tape, and painted the box. Next she filled it with treats, and stuck the bears onto it.
The kids really enjoyed this, and no sticks to wave around!
Of course there was pass-the-parcel and we went on a bear hunt.
Another fantastic idea, one which I didn't get a photo of, was to label all of the guests teddies. My Mum made a little container containing string, a pen and some colour sample cards with holes punched in, and each time a guest came, she wrote out a card saying "This teddy belongs to_______" and tied it to the bear.
The kids liked this a lot.
You can find some other bits and pieces here including the sound track, invitations and more! GO THERE NOW!
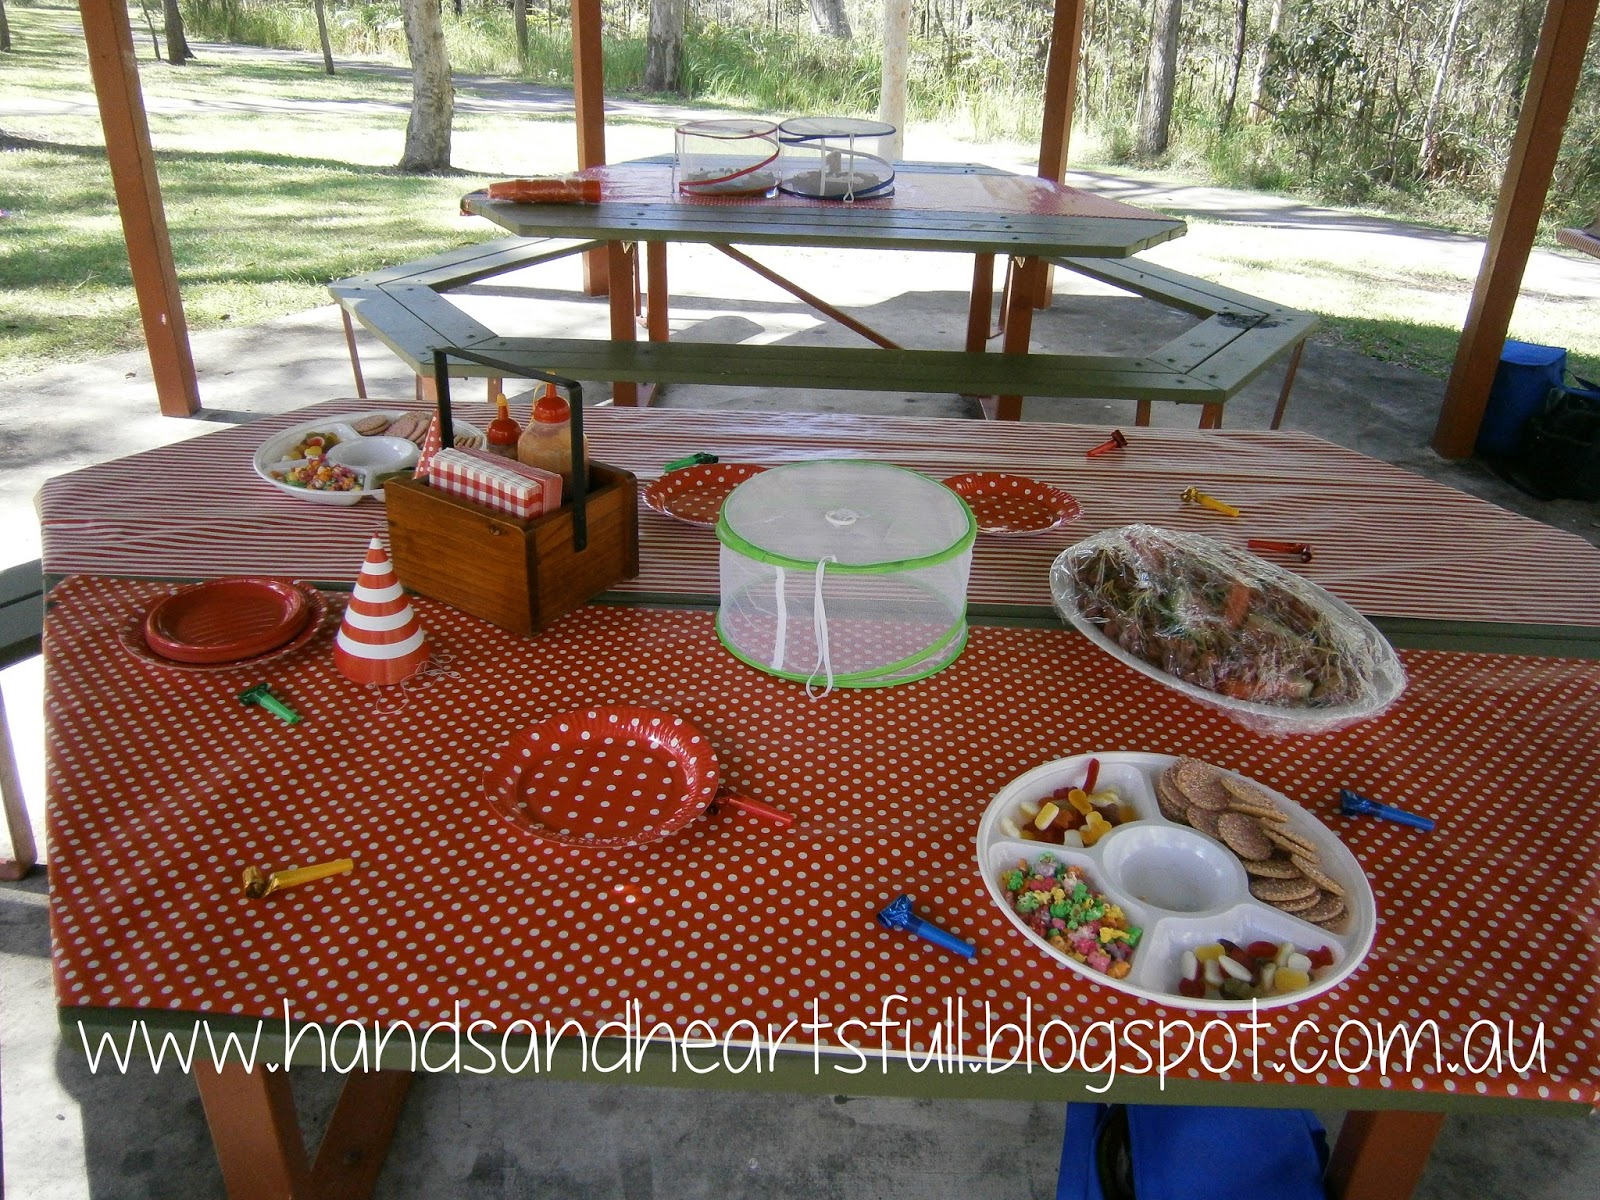
All in all, a great day was had. We did simple pizzas, party pies and sausage rolls, lollies, chips and popcorn for party food, as it was afternoon tea and really, the kids were more interested in playing.
Thanks to all who made this a success.
Happy Birthday Twinnie-Pops
Tuesday, 19 March 2013
Take Away v. Home Made: Chicken Chow Mein
It's our favourite dish when we order Chinese. Chinese take away, is not in our budget too often. Thus rises the dilemma.
I set about Googling, Pinteresting and asking about how I can make the awesome chicken and sauce that mimics our Chinese shop.
Most of the recipes on the internet, called to stir-fry the chicken. This is not how the Chow Mein I prefer is cooked. It's softer, more tender, and it's white, not browned, like in a stir-fry.
I found a sauce recipe that boasted that it was thick, so I stored it away, and kept searching for the method to cook the chicken. Some recipes said to poach it, so I tried that, but it was a bit too rubbery. Some recipes said to steam it, but it was a bit too dry and tasteless.
Then I found a thing called velveting. This method is a big winner. So, using a few different recipes, I've finally made something that I'm proud to call Chicken Chow Mein.
What also makes my Chicken Chow Mein better than the one in the take away shops, is that I use these new to Australian supermarket noodles.
I read about them a couple of years ago. Magic, low calorie, low GI, extremely low carb, gluten free, no fat noodles, made from the soluble fibre of the konjac root. These are like the magic filler or a meal. Brought here, by Cheng's a well known and trusted brand, I was keen to give them a go. What's better, is this week they are on special in Coles, for 2 packs for $3.
Now, I italicised the above text, so it draws your attention to it. These noodles are great. If you're on a weight loss journey, and are sick of feeling a bit empty, give the noodles a go. They can be used in soup, as pasta, in stir-fries and in spring rolls.
So, without further ado... Here is the perfect Chicken Chow Mein recipe.
Chicken Chow Mein- My style.
Feeds 4-6
Ingredients
Velvet Chicken
1kg boneless chicken thighs (or breasts)
2 egg whites
4 Tbls corn flour
1 tsp salt
1tsp pepper
The Vegetables
3 stalks of celery, cut into sticks
1 handful of snow peas, top and tailed
1/2 large red capsicum
1 onion, sliced
2 carrots, julienned
bean sprouts
shallots, sliced on the diagonal
The Sauce
11/2 cups chicken stock
4 Tbls soy sauce
1 Tbls fish sauce
1 Tbls oyster sauce
1 tsp sugar
3 Tbls corn flour
2 Tbls water
2 packets of Cheng's Low-Cal Wok Ready Noodles- rinsed
Method:
1) Slice your chicken thighs or breasts, against the grain. So, if you look down on your meat, you'll see a long side, and a short side. You want to cut, so that you're cutting short strips, not long strips... Does that make sense? If not, let me know.
2) In a bowl, whisk the egg whites until they just start to get frothy
3) Add the corn flour, salt and pepper and stir.
4) Add the chicken strips and coat well.
5) Cover and put in the fridge for at least 30 mins.
6) Bring a large pot of water to the boil.
7) Add your chicken, a little at a time, and stir well, separating the strips. When all the chicken is in, stir and wait for it to boil again.
8) When it's foaming up, and the chicken is white, remove from the water, using a slotted spoon. Place on a platter and cover. If you're not using it straight away, put it in the fridge. This can be done a few hours in advance.
9) Get your sauce ready! Add stock, all sauces and sugar into a jug, and stir to dissolve sugar.
10) In a small bowl, dissolve corn flour in the water.
11) Stir-fry all vegetables, except the bean sprouts and shallots (they'll be used as garnish). I prefer my veggies crunchy, so it only takes a couple of minutes.
12) Add the chicken. When that's heated through, add the stock based sauce, and bring to the boil. It wont take long.
13) Add the corn flour, and stir like a crazy person. It might be handy to have a little more stock on hand, in case it's too thick, although, mine was perfect.
14) Add in noodles and gently stir through
15) Serve in a bowl, with sprouts and shallots to garnish.
Yes, I realise the photo is a bit crap- but the food was delicious!
So.. Take Away v. Home Made?
Cost: TA: $11.90 for two serves
HM: $14 for 4 serves
I set about Googling, Pinteresting and asking about how I can make the awesome chicken and sauce that mimics our Chinese shop.
Most of the recipes on the internet, called to stir-fry the chicken. This is not how the Chow Mein I prefer is cooked. It's softer, more tender, and it's white, not browned, like in a stir-fry.
I found a sauce recipe that boasted that it was thick, so I stored it away, and kept searching for the method to cook the chicken. Some recipes said to poach it, so I tried that, but it was a bit too rubbery. Some recipes said to steam it, but it was a bit too dry and tasteless.
Then I found a thing called velveting. This method is a big winner. So, using a few different recipes, I've finally made something that I'm proud to call Chicken Chow Mein.
What also makes my Chicken Chow Mein better than the one in the take away shops, is that I use these new to Australian supermarket noodles.
I read about them a couple of years ago. Magic, low calorie, low GI, extremely low carb, gluten free, no fat noodles, made from the soluble fibre of the konjac root. These are like the magic filler or a meal. Brought here, by Cheng's a well known and trusted brand, I was keen to give them a go. What's better, is this week they are on special in Coles, for 2 packs for $3.
Now, I italicised the above text, so it draws your attention to it. These noodles are great. If you're on a weight loss journey, and are sick of feeling a bit empty, give the noodles a go. They can be used in soup, as pasta, in stir-fries and in spring rolls.
So, without further ado... Here is the perfect Chicken Chow Mein recipe.
Chicken Chow Mein- My style.
Feeds 4-6
Ingredients
Velvet Chicken
1kg boneless chicken thighs (or breasts)
2 egg whites
4 Tbls corn flour
1 tsp salt
1tsp pepper
The Vegetables
3 stalks of celery, cut into sticks
1 handful of snow peas, top and tailed
1/2 large red capsicum
1 onion, sliced
2 carrots, julienned
bean sprouts
shallots, sliced on the diagonal
The Sauce
11/2 cups chicken stock
4 Tbls soy sauce
1 Tbls fish sauce
1 Tbls oyster sauce
1 tsp sugar
3 Tbls corn flour
2 Tbls water
2 packets of Cheng's Low-Cal Wok Ready Noodles- rinsed
Method:
1) Slice your chicken thighs or breasts, against the grain. So, if you look down on your meat, you'll see a long side, and a short side. You want to cut, so that you're cutting short strips, not long strips... Does that make sense? If not, let me know.
2) In a bowl, whisk the egg whites until they just start to get frothy
3) Add the corn flour, salt and pepper and stir.
4) Add the chicken strips and coat well.
5) Cover and put in the fridge for at least 30 mins.
6) Bring a large pot of water to the boil.
7) Add your chicken, a little at a time, and stir well, separating the strips. When all the chicken is in, stir and wait for it to boil again.
8) When it's foaming up, and the chicken is white, remove from the water, using a slotted spoon. Place on a platter and cover. If you're not using it straight away, put it in the fridge. This can be done a few hours in advance.
9) Get your sauce ready! Add stock, all sauces and sugar into a jug, and stir to dissolve sugar.
10) In a small bowl, dissolve corn flour in the water.
11) Stir-fry all vegetables, except the bean sprouts and shallots (they'll be used as garnish). I prefer my veggies crunchy, so it only takes a couple of minutes.
12) Add the chicken. When that's heated through, add the stock based sauce, and bring to the boil. It wont take long.
13) Add the corn flour, and stir like a crazy person. It might be handy to have a little more stock on hand, in case it's too thick, although, mine was perfect.
14) Add in noodles and gently stir through
15) Serve in a bowl, with sprouts and shallots to garnish.
Yes, I realise the photo is a bit crap- but the food was delicious!
So.. Take Away v. Home Made?
Cost: TA: $11.90 for two serves
HM: $14 for 4 serves
Time: I was pretty impressed how quick it was put together. Probably quicker than getting in the car, ordering and waiting for it to be cooked. So HM wins.
Dietary Needs: Lots of vegetables, and with the noodles instead of rice, WAY less carbs! Win for HM
Convenience: I have the ingredients in my cupboard/fridge/freezer most of the time, so that's also pretty great.
So it's a WIN for Home Made!
Dietary Needs: Lots of vegetables, and with the noodles instead of rice, WAY less carbs! Win for HM
Convenience: I have the ingredients in my cupboard/fridge/freezer most of the time, so that's also pretty great.
So it's a WIN for Home Made!
Let me know if you try it, if you changed anything and what you thought!!!
Saturday, 9 March 2013
Adult Toy Review- Rating XXX
A competition, on Facebook!
Oh what do I have to do?
Vote on this, like a post,
Refer a friend or two?
You've gotta be in it to win it,
Was my motto, which stood by me.
But I think my obsession has gone too far,
Knowing what it is, was not the key.
I saw a post by Naughty Partys
A give away, she said.
Get your friends to come over and say hi,
And you can win this toy for bed.
I glanced at the picture,
My eyes got a little wider.
I've never seen anything so odd,
Looks like a rubber table cloth slider.
"Why not," my brain said to me.
Make it fun, if I win, I'll review it.
Surely another will want it more,
They'll have more friends, I knew it.
But my friends stood by me,
Went over and said hi.
I blushed at the postman,
Grimaced and waved good bye.
Here I hold the package,
Instructions in my hand.
In an empty house,
I look at my wedding band.
I feel the pressure to use it,
It's like it's taunting me.
Don't be scared, light some candles,
How awkward can this be?
..................................................................................................................
Well, let me just say,
I wasn't expecting that.
My imagination was far more horrible,
I thought I'd finish flat.
By myself I couldn't do it,
So I waited for the man.
We had some wine, got in the mood,
Finished watching Wedding Band.
And in the bedroom, together,
It wasn't even scary.
Ok- that's a lie,
Sorry Virgin Mary.
We played and we giggled,
It wasn't what I thought.
Back and front hole, no no.
It's for the button and the lady port.
So we played Christian and Ana,
Not that he knew the game.
But we tried something different,
And it was special all the same.
Now with out getting graphic,
Because Mum and Dad are reading this.
Using an adult toy in the bedroom,
Is certainly not a cuddle and a kiss.
So if you're feeling flat,
Talk to the ladies at Naughty Partys
Grab some batteries and some wine,
It'll make your heart race for starties.
And we're all adults here,
And we know you want to try it.
Don't be scared, have a look,
Message them and buy it!
Friday, 8 March 2013
Upcycle Old Formula Tins
I did this project a few weeks ago, and they've been really handy. You could keep craft supplies, flour, tea, or whatever you like. The tins are great because they are air tight... and FREE!
Tuesday, 26 February 2013
Vanilla Cupcakes with Vanilla Cream Cheese Frosting.
A good cupcake, starts with a good recipe. There are so many recipes on the internet, all giving a slightly different cupcake. Some are for a light and fluffy cupcakes, some are for cupcakes with domed tops, some are sweet, some are not, some are doughy, or crumbly or dense.
My cupcake has a flat top, which is perfect for decorating. My cupcake is sweet. My cupcake tastes like childhood. It is soft, but holds it's shape. It is moist and delicious... every time.
If you're an "I don't follow a recipe" baker, and you don't follow this recipe, to the gram, and then comment, that it doesn't work out, I will get stabby.
If you are a new baker, or an old baker with no skill, then read through the recipe twice, before you begin. Understand what you have to do, ask questions if you don't understand something. I check in often, so you won't be waiting long for an answer.
This recipe makes 24 extraordinary Vanilla Cupcakes
Note: I don't use brand name ingredients, but I do use fresh eggs. I have chooks, so most of the time, they are warm from a chooks bum.
About 2 hours before you start, get your eggs and butter out of the fridge to get to room temperature.
Vanilla Cupcakes
Ingredients
1 cup butter (not margarine)
2 cups white sugar
2 large eggs
1 tsp vanilla extract
1 1/2 cups self raising flour
1 1/4 cups plain flour
1/2 tsp salt
1 1/2 milk
Method
1) PREHEAT your oven to 190degrees C. DONT FORGET! (I often forget this step)
2) Put patty pan cases into trays.
3) Sift flours and salt into a large bowl, set aside
4) With an electric mixer, beat the butter and sugar together. Add the vanilla and eggs, and beat until the mixture has doubled in size and it very pale yellow.
5) Add the milk, but don't mix.
6) Using a spatula, scrape down the sides of the bowl, and begin to fold in a small amount of flour. Doing about 1/2 cup at a time, mix in the flour.
7) Using an ice cream scoop, or 1/3 of a cup measuring cup, put the batter into the patty pans.
8) Put into the oven, and then turn the oven down to 170 degrees C. Bake for 17-20 mins (depending on if you have a fan forced oven).
Vanilla Cream Cheese Frosting
Ingredients
1/4 cup of room temperature butter
170 g cream cheese at room temperature
4 cups icing mixture, sifted
1/4 tsp vanilla extract
Method
1) Beat butter and cream cheese together with the vanilla.
2) Add a little of the icing mixture at a time, beating well.
3) Beat on high for about 4-6 mins, until the frosting is very light and fluffy.
When the cupcakes are cool, pipe on frosting using a large nozzle. Decorate with hand made fondant decorations, and people will be very impressed.
My cupcake has a flat top, which is perfect for decorating. My cupcake is sweet. My cupcake tastes like childhood. It is soft, but holds it's shape. It is moist and delicious... every time.
If you're an "I don't follow a recipe" baker, and you don't follow this recipe, to the gram, and then comment, that it doesn't work out, I will get stabby.
If you are a new baker, or an old baker with no skill, then read through the recipe twice, before you begin. Understand what you have to do, ask questions if you don't understand something. I check in often, so you won't be waiting long for an answer.
This recipe makes 24 extraordinary Vanilla Cupcakes
Note: I don't use brand name ingredients, but I do use fresh eggs. I have chooks, so most of the time, they are warm from a chooks bum.
About 2 hours before you start, get your eggs and butter out of the fridge to get to room temperature.
Vanilla Cupcakes
Ingredients
1 cup butter (not margarine)
2 cups white sugar
2 large eggs
1 tsp vanilla extract
1 1/2 cups self raising flour
1 1/4 cups plain flour
1/2 tsp salt
1 1/2 milk
Method
1) PREHEAT your oven to 190degrees C. DONT FORGET! (I often forget this step)
2) Put patty pan cases into trays.
3) Sift flours and salt into a large bowl, set aside
4) With an electric mixer, beat the butter and sugar together. Add the vanilla and eggs, and beat until the mixture has doubled in size and it very pale yellow.
5) Add the milk, but don't mix.
6) Using a spatula, scrape down the sides of the bowl, and begin to fold in a small amount of flour. Doing about 1/2 cup at a time, mix in the flour.
7) Using an ice cream scoop, or 1/3 of a cup measuring cup, put the batter into the patty pans.
8) Put into the oven, and then turn the oven down to 170 degrees C. Bake for 17-20 mins (depending on if you have a fan forced oven).
Vanilla Cream Cheese Frosting
Ingredients
1/4 cup of room temperature butter
170 g cream cheese at room temperature
4 cups icing mixture, sifted
1/4 tsp vanilla extract
Method
1) Beat butter and cream cheese together with the vanilla.
2) Add a little of the icing mixture at a time, beating well.
3) Beat on high for about 4-6 mins, until the frosting is very light and fluffy.
When the cupcakes are cool, pipe on frosting using a large nozzle. Decorate with hand made fondant decorations, and people will be very impressed.
Thursday, 21 February 2013
Tears Before 7am
After getting back from a morning walk, trying to change who I am, because I'm fat. Because people have told me so since I was 8. Because I quit Ballet because I didn't look like the other girls. Because I never let on how the taunts hurt me. Because I was the girl who smiled and shrugged it off. Because I wasn't the girl who cared what people thought. Because I sought love from strangers to validate my beauty. Because I found a man who loves me even though I'm flawed. Because when I was pregnant with all my babies, the Doctors insisted on monitoring my healthy babies closely because I was fat. Because I left every antenatal appointment in tears, and my confidence of being a good mother was shattered. Because I watch the Biggest Loser and they say that they can't keep up with their children, because they're fat.
I came home, to this, posted by a friend. Posted by someone who knows what this is like.
http://www.youtube.com/watch?feature=player_embedded&v=ltun92DfnPY
Please, watch it. Watch it when you have time to cry. Don't keep reading, unless you've watch it, thought about it, shared it.
Sara wrote, that this deserves to go viral. It does.
This is my important part.
And they'll never understand that she's raising two kids, whose definition of beauty begins with the word Mom. Because they see her heart, before they see her skin. Because she has only ever, always been amazing.
What a morning. Sometimes things just confront you when you don't expect it.
What was your part. What are your thoughts?
I came home, to this, posted by a friend. Posted by someone who knows what this is like.
http://www.youtube.com/watch?feature=player_embedded&v=ltun92DfnPY
Please, watch it. Watch it when you have time to cry. Don't keep reading, unless you've watch it, thought about it, shared it.
Sara wrote, that this deserves to go viral. It does.
This is my important part.
And they'll never understand that she's raising two kids, whose definition of beauty begins with the word Mom. Because they see her heart, before they see her skin. Because she has only ever, always been amazing.
What a morning. Sometimes things just confront you when you don't expect it.
What was your part. What are your thoughts?
Tuesday, 19 February 2013
Chicken Noodle Soup with Croutons and Chicken Kiev with Roast Vegetables.
The weather is cooling down in Australia, and the food is warming up. I love Winter, where it's publicly acceptable to eat soup. I eat soup throughout the year, because I just can't help myself.
This feeds all six of us, but the Kiev isn't a favourite with the kids. When we're having them, they get a sausage, or a plain thigh, baked in the oven, smeared with a bit of tomato sauce.
Ingredients
3 cloves of garlic (2 for the kievs, 1 for the soup)
1 Tbls chopped herbs (I use Italian Parsley and Chives)
4 Tbls butter (not margarine) softened
2-3L chicken stock (home made or pre-bought- but don't use stock cubes only)
about 1kg fresh chicken thighs (or breasts- but thighs are flavour filled and inexpensive. Breasts will leave you with "prettier" chicken.) You need 1 for each person for the kiev, and at least 4 for the soup. No pre-frozen pieces (I cheated for the soup, and used a roast chicken from Coles)
2 chicken or bacon stock cubes
4 large potatoes, peeled
4 carrots, peeled
1 onion, diced (for soup)
1 onion quartered (for roast)
2 stalks of celery, diced
Pumpkin (for roast)
1 cup of frozen peas and corn combination
1/2 loaf of day old bread (unsliced preferably- I love sour dough cob loaf- but if you don't have these, just normal sliced bread will do)
Olive Oil
1-2 eggs, seasoned and beaten together
300g spaghetti broken into 3cm(ish) pieces
2 Tbls corn flour, mixed with 2Tbls warm water to make a paste
Method:
Day One
1) Start by making your garlic butter. To do this simply combine butter, herbs and 2 cloves of garlic. I use my stick blender, and wazz it until smooth. Put butter onto a piece of cling wrap and roll it into a thin log, and put it in the fridge. You want it to be able the thickness of your thumb.
2) Put the chicken stock onto boil in a large pot. Add whole chicken thighs, celery, 2 carrots, finely diced, onion, garlic, stock cubes and 1/2 a diced potato. Simmer until the chicken is cooked all the way through, about 20mins.
3) Meanwhile, place the rest of the vegetables, cut into roasting sized pieces into water, and put into the fridge.
4) Take half of your bread, and mix it in a food processor, and add some salt and pepper. You can also add herbs, if you want to be fancy. Add a little olive oil to bring it together. Cut the rest of the bread into cubes, place on a tray, and drizzle on a little bit of olive oil, salt and pepper. Bake in the oven on a low heat, until croutoney.
5) When your butter is firm enough to cut, take the cling wrap off, and cut to size. Wrap it inside your chicken thigh. If you're using breast, you need to make a cut and stuff it inside.
4) Dunk the chicken in the egg mixture. Coat the chicken into the bread crumb, back into the egg, and back into the crumb. Double crumbing will ensure the crumbs stick, and go nice and crunchy. Pro tip- use one hand for egg, one hand for crumb, and you wont end up with it on your hands, and none on the chicken. Wrap in cling wrap, and put in the freezer until tomorrow night.
5) Take your chicken out of the soup, and skim the weird stuff off the top of the liquid. Using a fork, shred chicken and put back into the soup. Add your corn flour paste, and stir well. When your soup thickens, add the noodles, and cook for the required amount of time for the noodles to cook.
6) Get the kids serves out well in advance, and let cool. Serve and allow everyone to add their own croutons... it's the best bit!
Day Two
1) Put chicken, potato and pumpkin into a roasting dish. Dress vegetables with olive oil and salt and pepper. Cook chicken kiev from frozen. Cook for 40-60 mins in a moderate oven (180degree C). When there is 20mins to go, add carrots, and if you're cooking sausages for the kids, pop them into the roasting dish too. They will need turning at 10mins to go.
Just before serving, microwave peas and corn in water, until hot.
The weather is cooling down in Australia, and the food is warming up. I love Winter, where it's publicly acceptable to eat soup. I eat soup throughout the year, because I just can't help myself.
This feeds all six of us, but the Kiev isn't a favourite with the kids. When we're having them, they get a sausage, or a plain thigh, baked in the oven, smeared with a bit of tomato sauce.
Ingredients
3 cloves of garlic (2 for the kievs, 1 for the soup)
1 Tbls chopped herbs (I use Italian Parsley and Chives)
4 Tbls butter (not margarine) softened
2-3L chicken stock (home made or pre-bought- but don't use stock cubes only)
about 1kg fresh chicken thighs (or breasts- but thighs are flavour filled and inexpensive. Breasts will leave you with "prettier" chicken.) You need 1 for each person for the kiev, and at least 4 for the soup. No pre-frozen pieces (I cheated for the soup, and used a roast chicken from Coles)
2 chicken or bacon stock cubes
4 large potatoes, peeled
4 carrots, peeled
1 onion, diced (for soup)
1 onion quartered (for roast)
2 stalks of celery, diced
Pumpkin (for roast)
1 cup of frozen peas and corn combination
1/2 loaf of day old bread (unsliced preferably- I love sour dough cob loaf- but if you don't have these, just normal sliced bread will do)
Olive Oil
1-2 eggs, seasoned and beaten together
300g spaghetti broken into 3cm(ish) pieces
2 Tbls corn flour, mixed with 2Tbls warm water to make a paste
Method:
Day One
1) Start by making your garlic butter. To do this simply combine butter, herbs and 2 cloves of garlic. I use my stick blender, and wazz it until smooth. Put butter onto a piece of cling wrap and roll it into a thin log, and put it in the fridge. You want it to be able the thickness of your thumb.
2) Put the chicken stock onto boil in a large pot. Add whole chicken thighs, celery, 2 carrots, finely diced, onion, garlic, stock cubes and 1/2 a diced potato. Simmer until the chicken is cooked all the way through, about 20mins.
3) Meanwhile, place the rest of the vegetables, cut into roasting sized pieces into water, and put into the fridge.
4) Take half of your bread, and mix it in a food processor, and add some salt and pepper. You can also add herbs, if you want to be fancy. Add a little olive oil to bring it together. Cut the rest of the bread into cubes, place on a tray, and drizzle on a little bit of olive oil, salt and pepper. Bake in the oven on a low heat, until croutoney.
5) When your butter is firm enough to cut, take the cling wrap off, and cut to size. Wrap it inside your chicken thigh. If you're using breast, you need to make a cut and stuff it inside.
4) Dunk the chicken in the egg mixture. Coat the chicken into the bread crumb, back into the egg, and back into the crumb. Double crumbing will ensure the crumbs stick, and go nice and crunchy. Pro tip- use one hand for egg, one hand for crumb, and you wont end up with it on your hands, and none on the chicken. Wrap in cling wrap, and put in the freezer until tomorrow night.
5) Take your chicken out of the soup, and skim the weird stuff off the top of the liquid. Using a fork, shred chicken and put back into the soup. Add your corn flour paste, and stir well. When your soup thickens, add the noodles, and cook for the required amount of time for the noodles to cook.
6) Get the kids serves out well in advance, and let cool. Serve and allow everyone to add their own croutons... it's the best bit!
Day Two
1) Put chicken, potato and pumpkin into a roasting dish. Dress vegetables with olive oil and salt and pepper. Cook chicken kiev from frozen. Cook for 40-60 mins in a moderate oven (180degree C). When there is 20mins to go, add carrots, and if you're cooking sausages for the kids, pop them into the roasting dish too. They will need turning at 10mins to go.
Just before serving, microwave peas and corn in water, until hot.
Subscribe to:
Posts (Atom)


.jpg)